Direct VNC Connection Through a Restrictive Firewall Over Port 443
Sometimes you just want to check in on your home services over public Wi-Fi, but the firewall is smarter than most, and VNC and VNC-related cloud services are blocked. You register a vanity domain name, have it resolve to your home gateway, then use an encrypted VNC session over port 443 (HTTPS).
If you only have available ports 80 and 443 for egress data and the firewall maintains a blocklist of common cloud-based VNC services, then this may help. You will need:
- A RealVNC Enterprise trial account (30-days or US$55/yr)
- A Noip.com free account (or a DNS provider with an API—Cloudflare also)
- A domain with DNS control (for CNAME/ALIAS creation)
- Target machine LAN gateway access (for port forwarding)
The idea is to establish a direct VNC connection using a domain name you control, so it shouldn’t be on any blocklist. You will establish a VNC connection using this uncommon domain name at port 443. You can do this by adding a CNAME entry pointing to a (likely) blocked No-IP vanity domain you also control. The Noip.com vanity domain should resolve to the IP address of the gateway machine (or ISP IP) in front of the target VNC server. A machine on this LAN should have the No-IP DUC (DNS Update Client) running to notify No-IP if the gateway IP (or ISP IP) changes.
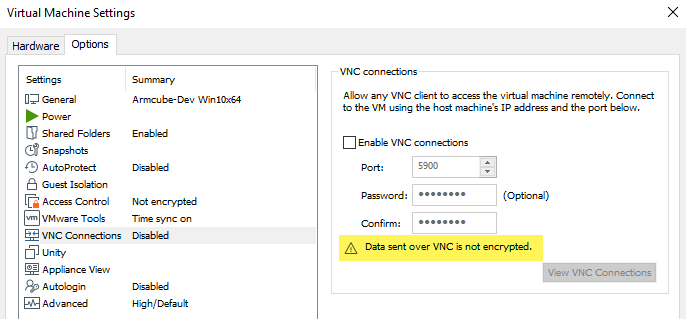
VMWare’s Built-in VNC
I’m a huge fan of VMWare, and VMWare Desktop has built-in VNC functionality. However, it is not encrypted. A direct VNC connection may work for a while, but the firewall may be reactive, and some WAF packet inspection rules may detect the tell-tale VNC packet headers and block the connection. That is why, inside my VMWare instance, I’m using a third-party VNC server daemon.
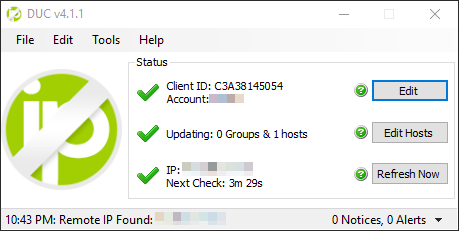
1. Register a Noip.com Account and Setup Utility
This could be Noip.com, DynDNS, or any dynamic DNS provider. You could skip this if you have a static IP at your gateway or ISP. At this time, I use a dynamic ISP IP and a VPN that also changes periodically, so I need a dynamic DNS solution. There are many guides on the net, but essentially install the DUC (DNS Update Client) somewhere on your LAN to periodically report your current external IP back to No-IP, so your chosen vanity domain name’s A-record points to your current gateway IP.
vnc-example.ddns.net –> 114.78.23.103 (WAN)
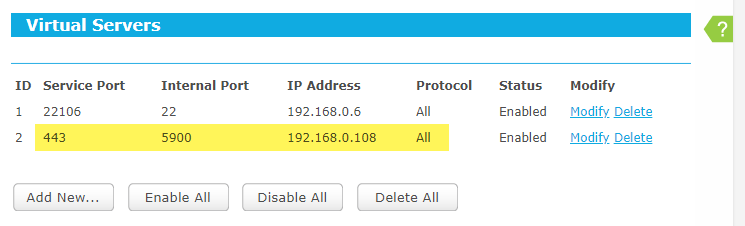
2. Setup Port-Forwarding on the Gateway Router
Your vanity domain resolves to your gateway IP. If your VNC server is going to be on machine 192.168.0.108, for example, then make sure the 192.168.0.0/24 subnet is reachable from the gateway (typically the main router). With only ports 80 and 443 to work with, forward port 443 to 5900 like so.
WAN (443) –> 192.168.0.108 (5900)
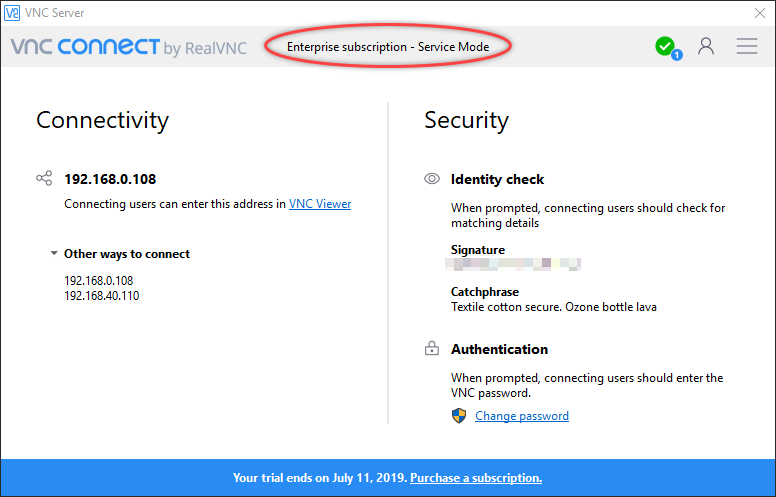
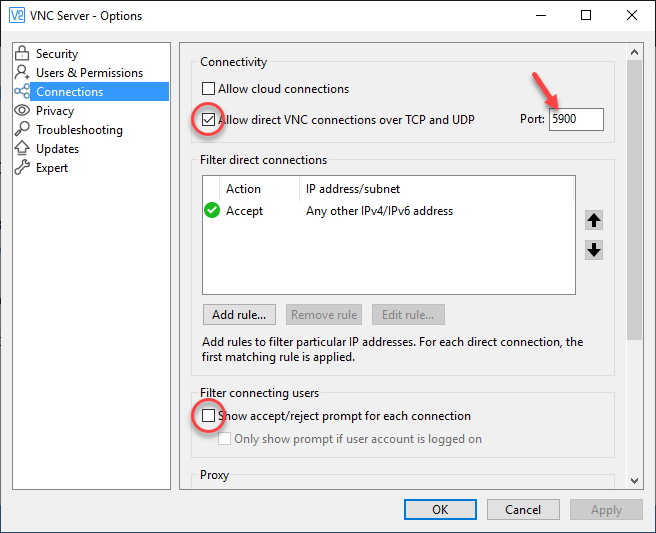
3. Setup RealVNC Connect Server
Register for a trial of RealVNC Enterprise so that you can use direct connections instead of cloud-only connections. This is essential. If you prefer another VNC server vendor that allows direct connections, feel free to substitute it for RealVNC. I prefer RealVNC because they have an excellent iOS VNC client app which I love. Install the server app. You do not need to register any computers in the web portal. In the settings dialog of the app on the machine you wish to control, sign in to activate your trial. This will unlock the setting to allow direct connections. Uncheck cloud connections, but enable direct connections.
4. Add a CNAME/ALIAS DNS Record
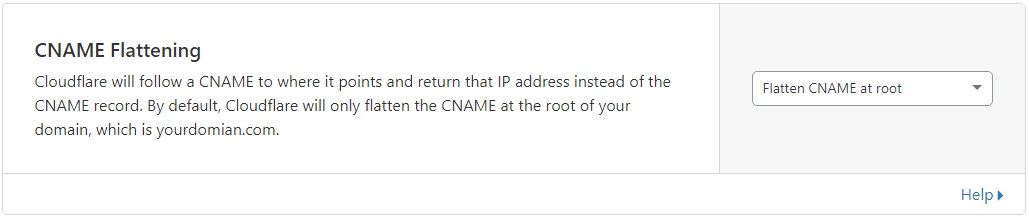
If your firewall blocks Noip.com known domain names (e.g. *.ddns.net), you can bypass this block with a domain you control. Add an ALIAS record to point to your No-IP vanity domain so it returns your gateway IP directly to the client. I use Cloudflare for my DNS provider. If you do as well, you’re lucky, because it supports automatic CNAME flattening. Also, make sure to allow pass-through connections. Set the TTL to automatic (4 hours) or even shorter (as low as 2 minutes).
CNAME vnc –> vnc-example.ddns.net

5. Test the Connection
If all goes well, your routing setup will look like this:
vnc.yourdomain.com:443
–> vnc-example.ddns.net:443 (CNAME)
–> 114.78.23.103:443 (WAN IP)
–> 192.168.0.108:5900 (VNC server)
Discussion
This is a pretty simple trick to use port 443 as an entry to your home network in case the Wi-Fi in your favorite coffee shop blocks most ports and has something like PiHole installed on their network to block sites as they see fit.
If you are behind a restrictive firewall with a WAF, packet inspection, or a MITM to read your TLS traffic, then you may have to use something similar to my other technique.