Undetectable USB Mouse Jiggler to Prevent Screensaver
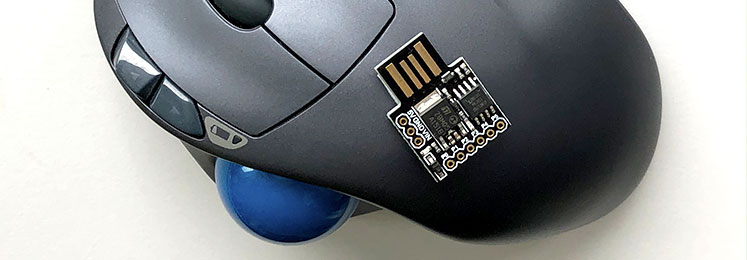
During the day I’d like to see Slack messages and real-time updates on various platforms, but in the evening I’d like the screensaver to run as intended. If I edit the system settings twice a day then I’m bound to forget one state or another.
A sample of what’s available on Amazon for USB mouse jigglers is below.

For USD $2 you can have the same thing with minimal effort, and you can highly customize it.
Hardware – ATtiny85 Digistump
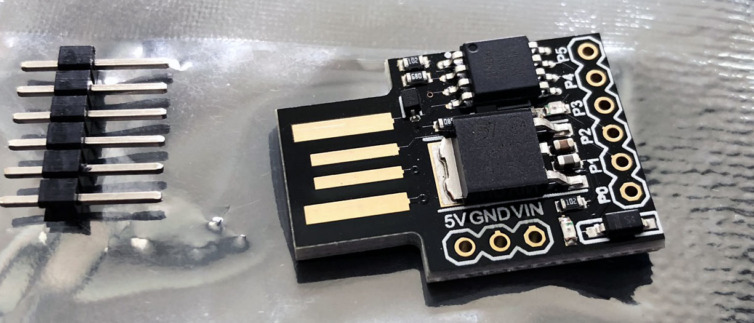
Purchase a very simple ATtiny85 Digistump from Adafruit or AliExpress.

Here I’ve just ordered one and it came in a mylar anti-static bag.
Programmer – Arduino IDE
Install Arduino 1.8.5, not any of the newer versions as they have known connectivity bugs.
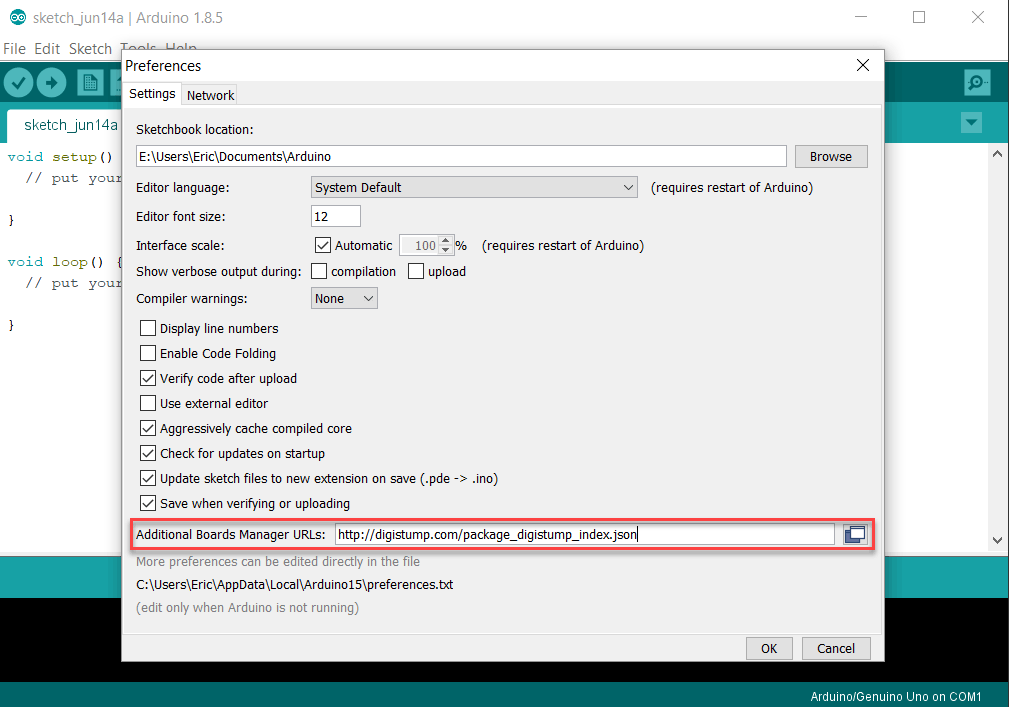
Add the Digistump boards like so using //digistump.com/package_digistump_index.json in the board managers URL.
Install the AVR boards.

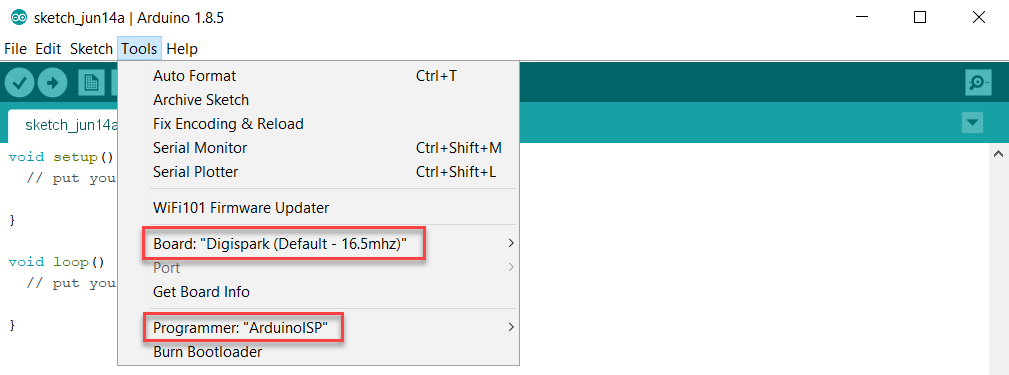
Select the Digispark board and programmer as shown below.
Software – Arduino Sketch for Digistump
Here is a very simple sketch to jiggle the mouse ever thirty seconds:
1 2 3 4 5 6 7 8 9 10 11 12 13 | #include <DigiMouse.h> void setup(){ DigiMouse.begin(); } void loop() { while(true) { DigiMouse.move(2,0,0); // 2px right DigiMouse.delay(50); DigiMouse.move(-2,0,0); // 2px left DigiMouse.delay(30000); } } |
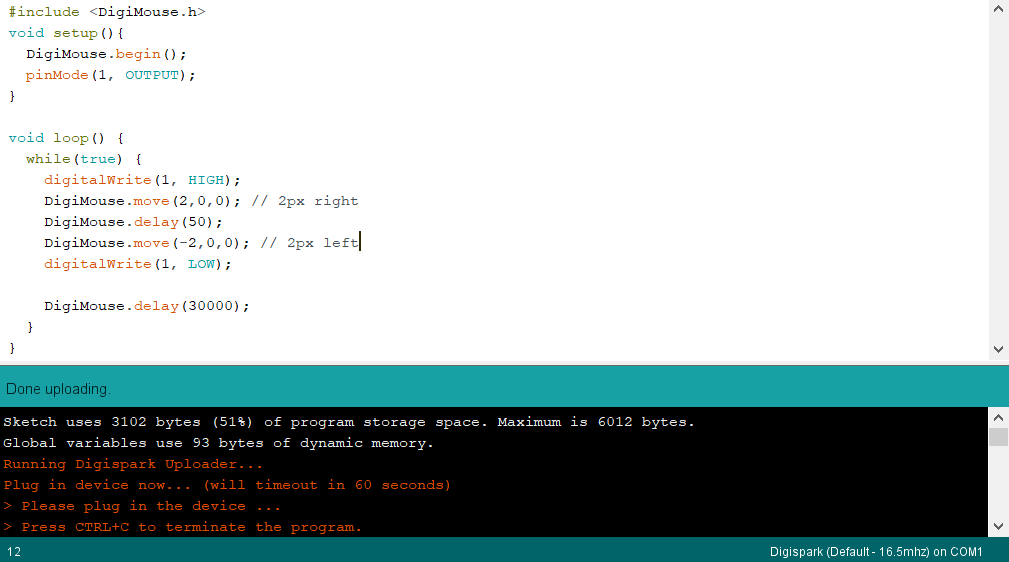
Here is the same sketch except during jiggle the on-board LED will blink.
1 2 3 4 5 6 7 8 9 10 11 12 13 14 15 16 | #include <DigiMouse.h> void setup(){ DigiMouse.begin(); pinMode(1, OUTPUT); } void loop() { while(true) { digitalWrite(1, HIGH); DigiMouse.move(2,0,0); // 2px right DigiMouse.delay(50); DigiMouse.move(-2,0,0); // 2px left digitalWrite(1, LOW); DigiMouse.delay(30000); } } |
Use DigiMouse.delay() and not just delay or else the USB device will fail and Windows will display the “device malfunctioned” message. If you use an Arduino board like the Arduino Leonard, then you can use the native Mouse.h and normal delays.
Click the upload icon and wait for the message to plug in the Digispark. When plugged in, within a few seconds the sketch will upload. The device will be detected as a DigiKey USB device.
Advanced
If you prefer the USB mouse jiggler to look like a real mouse to most computers, then you can edit the usbconfig.h deep in the Digistump hardware folder. You do not need to recompile the bootloader.

Edit the following file in Windows,
1 | %LOCALAPPDATA%\Arduino15\packages\digistump\hardware\avr\1.6.7\libraries\DigisparkMouse\usbconfig.h |
and find the following section:
1 2 3 4 5 6 7 8 9 10 11 12 13 14 15 16 17 18 19 20 21 22 23 24 25 26 27 28 29 30 31 32 33 34 35 36 37 38 39 40 41 42 43 44 45 46 47 48 49 50 51 52 53 54 55 56 57 58 59 60 61 62 | /* -------------------------- Device Description --------------------------- */ #define USB_CFG_VENDOR_ID 0xc0, 0x16 /* USB vendor ID for the device, low byte first. If you have registered your * own Vendor ID, define it here. Otherwise you may use one of obdev's free * shared VID/PID pairs. Be sure to read USB-IDs-for-free.txt for rules! * *** IMPORTANT NOTE *** * This template uses obdev's shared VID/PID pair for Vendor Class devices * with libusb: 0x16c0/0x5dc. Use this VID/PID pair ONLY if you understand * the implications! */ #define USB_CFG_DEVICE_ID 0xda, 0x27 /* This is the ID of the product, low byte first. It is interpreted in the * scope of the vendor ID. If you have registered your own VID with usb.org * or if you have licensed a PID from somebody else, define it here. Otherwise * you may use one of obdev's free shared VID/PID pairs. See the file * USB-IDs-for-free.txt for details! * *** IMPORTANT NOTE *** * This template uses obdev's shared VID/PID pair for Vendor Class devices * with libusb: 0x16c0/0x5dc. Use this VID/PID pair ONLY if you understand * the implications! */ #define USB_CFG_DEVICE_VERSION 0x00, 0x01 /* Version number of the device: Minor number first, then major number. */ #define USB_CFG_VENDOR_NAME 'd','i','g','i','s','t','u','m','p','.','c','o','m' #define USB_CFG_VENDOR_NAME_LEN 13 /* These two values define the vendor name returned by the USB device. The name * must be given as a list of characters under single quotes. The characters * are interpreted as Unicode (UTF-16) entities. * If you don't want a vendor name string, undefine these macros. * ALWAYS define a vendor name containing your Internet domain name if you use * obdev's free shared VID/PID pair. See the file USB-IDs-for-free.txt for * details. */ #define USB_CFG_DEVICE_NAME 'D','i','g','i','K','e','y' #define USB_CFG_DEVICE_NAME_LEN 7 /* Same as above for the device name. If you don't want a device name, undefine * the macros. See the file USB-IDs-for-free.txt before you assign a name if * you use a shared VID/PID. */ #define USB_CFG_SERIAL_NUMBER 'd','i','g','i','s','t','u','m','p','.','c','o','m',':','M','o','u','s','e' #define USB_CFG_SERIAL_NUMBER_LEN 19 /* Same as above for the serial number. If you don't want a serial number, * undefine the macros. * It may be useful to provide the serial number through other means than at * compile time. See the section about descriptor properties below for how * to fine tune control over USB descriptors such as the string descriptor * for the serial number. */ #define USB_CFG_DEVICE_CLASS 0 /* set to 0 if deferred to interface */ #define USB_CFG_DEVICE_SUBCLASS 0 /* See USB specification if you want to conform to an existing device class. * Class 0xff is "vendor specific". */ #define USB_CFG_INTERFACE_CLASS 0x03 /* HID */ /* define class here if not at device level */ #define USB_CFG_INTERFACE_SUBCLASS 0x0 #define USB_CFG_INTERFACE_PROTOCOL 0x0 /* See USB specification if you want to conform to an existing device class or * protocol. The following classes must be set at interface level: * HID class is 3, no subclass and protocol required (but may be useful!) * CDC class is 2, use subclass 2 and protocol 1 for ACM |
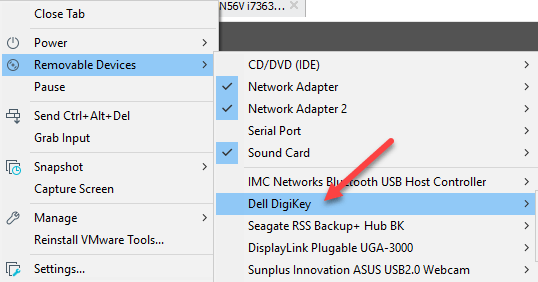
By visiting devicehunt.com you can find the vendor ID and device ID of any USB you want the Digistump to masquerade as. The relevant constants are USB_CFG_VENDOR_ID and USB_CFG_DEVICE_ID.
#define USB_CFG_VENDOR_ID 0xef, 0x12.For example, the ATtiny85 is detected as a Dell mouse in the screenshot below.
Results

Here we were able to acquire an inexpensive USB AVR board (ATtiny85), install Arduino IDE to Windows, add some AVR board drivers, write a very simple mouse jiggler script, modify the USB “manufacturer”, and upload the code to the ATtiny85 Digistump. Every thirty seconds the mouse will jiggle. This can be extended to any Arduino board (e.g. Arduino Leonard), though this is by far the most cost-effective.
References and Inspiration
- Bad USB Security
- Use ATtin85 with Arduino IDE
- Digistump boards JSON
- Original Digispark USB development boards